What Does Concrete Preparation Involve Before a Polyaspartic Floor Coating?
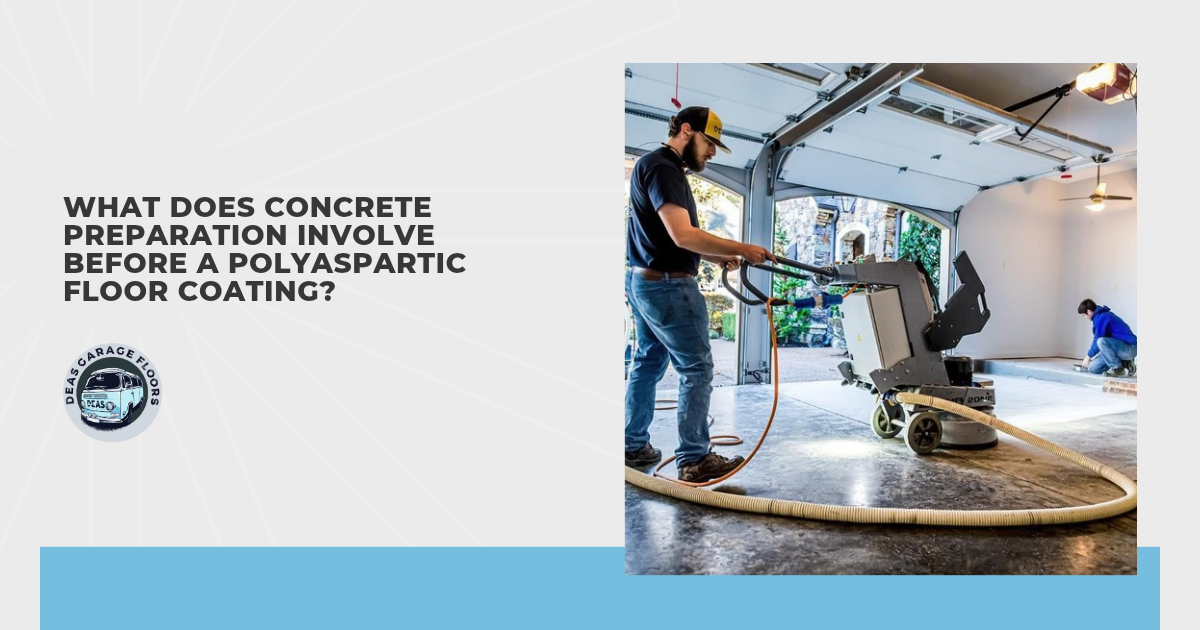
Concrete preparation before a polyaspartic floor coating involves checking the slab, removing oil and old finishes as needed, grinding the surface, repairing damaged areas, and cleaning up the dust. A final check confirms that the floor is ready for the base coat. I put a lot of importance on this work because even a good coating needs a clean, solid surface with the right texture to bond properly.
If you’re planning a garage floor project in Tennessee, knowing what preparation involves can help you understand the work included in your estimate. Peeling paint, an old oil spill, and chipped concrete each need different attention, so the preparation will depend on what’s on your floor. Grinding may also uncover damage that wasn’t visible at first, which can mean additional repairs before coating begins.
Let’s walk through what concrete preparation involves before polyaspartic floor coatings are applied:
- Step 1: Concrete inspection and repair assessment
- Step 2: Oil, grease, and contaminant removal
- Step 3: Old coating removal and diamond grinding
- Step 4: Crack, pit, and surface repairs
- Step 5: Dust and debris removal
- Step 6: Final surface and application checks
Step 1: Concrete Inspection and Repair Assessment
Preparation starts with a close look at the floor’s condition. The crew checks for cracks, chipped or crumbling areas, old coatings, stains, and signs of water entering the garage. Previous patches also need attention because loose or failing repairs won’t provide a reliable base for a polyaspartic floor coating. Those findings help determine the cleaning, removal, and repair work the floor needs.
At this stage, I find it helpful to separate surface repairs from problems that need further assessment. Shallow pits may be repairable during preparation, while a sunken section or a crack with uneven edges may need a concrete specialist’s attention. Mention any recurring leaks or repairs that have reopened, since those details can help explain what’s visible during the visit. The steps below describe the general process, but the order of repairs and grinding can vary with the floor’s condition.
Step 2: Oil, Grease, and Contaminant Removal
Oil and grease need more than a quick sweep. The crew treats affected areas with a cleaner suited to the residue, works it into the surface as directed, and removes the loosened material and cleaning residue. Any rinsing and drying must follow the cleaner’s instructions and the coating system’s requirements. Oily areas need attention before grinding so the equipment doesn’t spread contamination across the floor.
An old stain’s color alone doesn’t show whether enough oil has been removed for a polyaspartic floor coating to bond. Deeply soaked areas may need repeated treatment or removal of affected concrete. A floor that looks cleaner isn’t necessarily ready, so stubborn contamination can add work before preparation moves forward.
Step 3: Old Coating Removal and Diamond Grinding
Loose paint and old finishes that aren’t suitable beneath the new system need removal, rather than a quick roughening. Diamond grinding uses rotating tools fitted with diamond abrasives to remove material from the concrete’s surface. The equipment and tooling depend on the existing finish, the concrete’s condition, and the coating manufacturer’s requirements.
A smooth, polished appearance isn’t what I’d look for here. The concrete needs a specific surface texture, often called a profile, that gives the base coat something to grip. The required texture varies by coating system, so making the floor as rough as possible isn’t the goal. Smaller equipment prepares edges, corners, and areas around fixed obstacles that the main grinder can’t reach.
Step 4: Crack, Pit, and Surface Repairs
Loose material is removed from damaged areas before suitable cracks, pits, and chips are filled. Repair products need to be approved for use beneath the chosen polyaspartic floor coating system, since an unsuitable filler can create problems between the layers. Repaired areas are brought level with the surrounding concrete and given the time required to set. Further grinding may be needed to blend the repairs into the surface.
Cracks and joints shouldn’t automatically receive the same treatment. Joints are planned cuts or separations in concrete that help control where cracking occurs or accommodate movement. Depending on the joint’s purpose, it may need to remain flexible or continue through the finished coating. Ask how these areas will be handled rather than assuming every visible line will be filled and covered
Step 5: Dust and Debris Removal
Grinding equipment can collect dust as it works, but the floor still needs a thorough cleanup afterward. Vacuuming removes loose particles from the main surface, edges, corners, and repaired areas. Dust left behind can interfere with the bond between the concrete and the base coat.
The prepared floor also needs to stay clean until the polyaspartic floor coating is applied. Walking across it in dirty shoes or carrying dusty items through the garage can reintroduce debris. Keeping the work area clear helps avoid another round of cleaning before coating.
Step 6: Final Surface and Application Checks
The final review checks that the concrete has the required texture, repairs are ready, and dust and residue have been removed. Floor temperature and surrounding conditions must also meet the coating product’s application requirements. Warm air doesn’t necessarily mean the slab is warm, and humid air meeting cool concrete can cause condensation. Surface condensation or water entering the garage can delay application even when the grinding and repairs are finished.
Any damage exposed during preparation also needs to be addressed before it’s covered. I’d rather see necessary repair work completed at this point than have the crew rush to keep the original schedule. Once the prepared floor and application conditions meet the selected system’s requirements, the base coat can go down.
Conclusion
Once the final checks are complete, the floor is ready for the part you’ll actually see: the coating. Most of the preparation will be hidden beneath it, which is why I’d give that work as much attention as the color or finish. When discussing a polyaspartic floor coating, ask how the concrete will be prepared and which repairs are included. Those details help you understand what you’re paying for beyond the finished appearance.

CONTACT INFO
DEAS Garage Floors
12210 Dargie Dr,
Arlington, TN 38002
Phone
SCHEDULE A CONSULTATION
Contact us, and we will come out and discuss your project free of charge.